How to Sew Suspender Buttons on Pants
Shopping for suspenders is satisfying for those who want to make the switch from wearing belts all the time, and for those who wish to add suspenders to their outfit options. By now, you've seen many style options for clip-on and button-on styles.
You've decided you'd like to wear Button-On Suspenders - either for everyday casual or business wear or for a special occasion. Now all you need to do is make sure your pants have buttons on them for the suspenders to attach to. You can do a quick check of all of the pants you intend to wear with your button-on suspenders. Generally, having one or more pairs of trousers with suspender buttons included saves you the trouble of adding buttons. However, it's likely you have pants without buttons, and this means you must add them before enjoying your suspenders. If this seems a bit daunting, read on and we'll tell you exactly what you need to know about how to sew buttons on pants for suspenders correctly!
Choosing your Suspender Button Method
First things first - make sure the pants you intend to wear the suspenders with don't already have buttons sewn in them! Assuming they do not, decide which method of getting suspender buttons on your pants you prefer:
- Take your pants to a tailor
- Do it yourself with a needle and thread
- Do it yourself with bachelor (no-sew) buttons
Obviously, taking your trousers to a tailor is the easiest way to go. Any tailor will know the correct placement and techniques for adding suspender buttons to your pants. You can expect to pay about $10 to $15 for this service. If you are buying your trousers un-hemmed from a store with an in-house tailor, then you can simply have them add the buttons when they are hemming your pants.
However, if you are more of a "do-it-yourself" type of person, or if the idea of paying someone $10 to $15 to simply sew six buttons onto a pair of pants seems ridiculous - then sewing on buttons yourself will be the way to go. Take a look at what you need to do suspenders button placement successfully.
Supplies and Button Placement
If you are planning to use the needle and thread approach, you will need the following supplies:

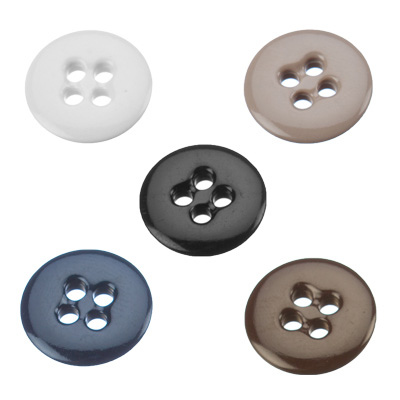
- Six Suspender Buttonsper pair of pants
- The buttons should be 5/8-inch wide buttons with four holes
- The sides of the buttons should be rounded rather than straight to minimize friction against the buttonholes on the suspender attachment /moustache (We sell these buttons if you need them.)
- While it is not critical because the buttons will not be visible, choosing a button color that is a general match to the color of the trousers or the inside lining of the pants is a good idea
- A needle
- Thread in a color that matches the color of the pants or the lining
- A measuring tape or ruler
- Chalk
- A pair of pants
The general idea is to sew the buttons on the pants in such a way that:
- Best supports the way the pants will "fall"
- Is not visible
- Is most comfortable
- Looks right in terms of how far apart or close together the two ends of the "moustache" are when the suspenders are being worn. Incorrectly placed buttons may result in an uncomfortable fit or poor support of the pleats or pant lines
Before we get started with more specific instructions, one big picture question to answer is whether the buttons should be sewn on the inside or outside of the pants. In the old days, suspender buttons were sewn on the outside of the pants. And while you may occasionally still see this approach today, the more accepted current approach is to sew the buttons on the inside. Although no one knows for sure why this has changed, one theory is that in the past when people wore a suit with suspenders and vest, the vests were commonly worn on top of the suspenders and the buttons were therefore not visible. When the vests disappeared, in most cases, the buttons moved to the inside of the pants.
Basically, having suspender buttons inside or outside is a personal choice, but most people place them inside.
Step 1: Determine Where to Place the Buttons on the Front of the Pants
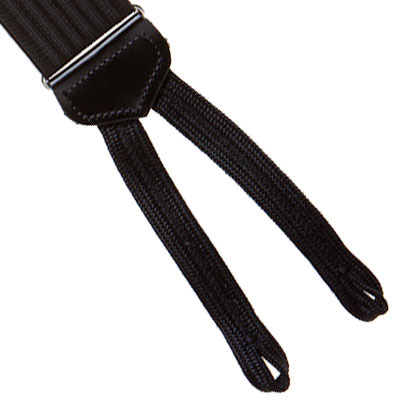
 The buttons will attach to the “moustaches” at the end of the suspenders.
There are several methods for determining where to place the buttons on the front of the pants. The first is the traditional "by the book" method. The second is a more personalized approach we often recommend, which may better accommodate body differences and personal preferences. Choose the method you think will work best for you.
Method 1: Lay the pants on a flat surface. The suspenders will attach to four buttons (two on the left and two on the right) via a "moustache" or "rabbit ear", which is simply a strip of leather or fabric with a buttonhole on either end. If the pants are pleated, the foremost button on each side should be placed on the inside waistband of the pants, directly above the pleat and about one inch down from the top. If the pants are not pleated, the buttons should go at the same place directly over the crease.
Mark the spot the first button will go on each side with the chalk. Then take your tape measure or ruler and mark the spot the second button on each side should go. This should be about 2 ½ to 3 inches towards the side seam from the first button.
Method 2: Since everybody is different, this method allows you to determine exactly where the suspenders will look best on you. If following this approach, simply lay the suspenders over your shoulders and hold them over your torso while looking into a mirror. Adjust their position until you get exactly the look and position that you want and mark those spots. Check to be sure that they are both an equal distance from the centerline of the pants. Mark the button locations 2 ½ to 3 inches apart based on your personal preference.
Step 2: Determine Where to Place the Buttons on the Back of the Pants
Now turn your attention to the back of the pants. Since button-on suspenders typically come in a Y-back construction, you will be sewing on two buttons for a single attachment point in the center of your back. The buttons for your suspenders should be placed at an equal distance on each side of the center seam, about 2 ½ to 3 inches apart from each other. Take your tape measure and measure 1 ¼ to 1 ½ inches on each side of the center seam and mark the spot for each button. This should also be about one inch down from the top of the waistband.

Step 3: Thread the Needle
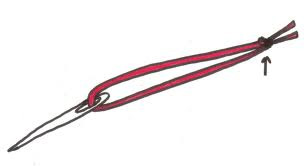
We recommend double-threading the needle to make the job quicker. To do so, simply pull the thread through the needle until there is an equal length of thread on both sides, and then tie a knot at the end.
Step 4: Sew the Buttons onto the Pants
Holding the button in place, push the needle down through the fabric, and then bring it up through one of the holes on the button. Pull until the knotted end catches. To avoid the thread being visible on the outside of the pants, be sure to push the needle only part way through the waistband.
Generally, there are two layers in the waistband: the waistband facing material and an interfacing layer along with the outer fabric. Be sure to push the needle through the waistband fabric and the interfacing layer only. Making an X pattern, go down through the diagonally opposite hole and then back up through an adjacent hole. Repeat this step seven to eight times per button. Tie off the end of the thread with a double knot. Repeat for all six buttons and then you are done!
A final option for adding buttons to pants, if you don't want to take the pants to a tailor, or use a needle and thread, is to use a set of "no-sew" buttons, which are also sometimes called "bachelor buttons." SuspenderStore carries bachelor buttons in two styles: permanent and moveable.
 Permanent NoSew Buttons
 Moveable No-Sew Buttons
- Permanent No-Sew Buttonsremain in place on the pants after they are attached. These nifty buttons can simply be hammered onto the pants by pushing the pin side through the material, putting the button side onto the pin and lightly tapping to join the two sides together. Please note the pin side of the bachelor button will be visible on the outside of the pants as a small metal stud.
- Moveable No-Sew Buttonssimply clip on and off your trousers. They are as permanent or temporary as you want them to be. Simple and sturdy, they will not come off your trousers until you take them off to attach to a different pair of trousers. They can be worn with the button on the inside or the outside of the pants.
A final question and the answer: What should you do with the belt loops?
Is there a way to make pants for suspenders even better? Yes, there is. If you want to be completely correct in the staid world of fashion, then take the belt loops off. Assuming that you intend to wear only suspenders with the pants you have attached buttons to, then your jeans, khakis or tuxedo pants belt loops are now irrelevant. Removing them will give the pants a cleaner look.
However, if you would like to be able to wear the pants with either a belt or suspenders, then leave the belt loops intact. While this may not be completely correct in the world of fashion, since most people do not wear suspenders, the vast majority of people you meet will either be so enamored with the look of the suspenders themselves that they will not notice the belt loops, or notice the belt loops but not be sufficiently fashion savvy to know the fashionistas of the world would prefer them to be removed.
Some folks choose the middle road here, removing the belt loops from business suits and dress pants and leaving them on pants for more casual wear. The choice is really a matter of personal preference.
Conventional fashion wisdom also tells us one should not wear suspenders and a belt at the same time. However, to this we say - "why not?" There are enough people in the world that like to wear both a belt and suspenders at the same time that we carry Belt Clip Suspenders specifically designed to attach to a belt.

At SuspenderStore, we believe suspenders are a statement of personal style and that one should not be limited in how one chooses to express that style. We particularly enjoy the following quote by Charles Tatum:
"I've done a lot of lying in my time. I've lied to men who wear belts. I've lied to men who wear suspenders. But I'd never be so stupid as to lie to a man who wears both belt and suspenders."
Plus, if you need additional support because of your build, or because you carry a heavy load on your belt, wearing both suspenders and a belt can give you that extra needed support.
So in closing, we applaud your choice to give Button-On Suspenders a try. We think you'll enjoy the traditional look and outstanding support they provide. If you have any further questions regarding suspender styles and options, be sure to check out our other style guides or give us a call at 1-800-393-4508. We're sure you'll find our advice to be "right on the button"!


